

Issue description
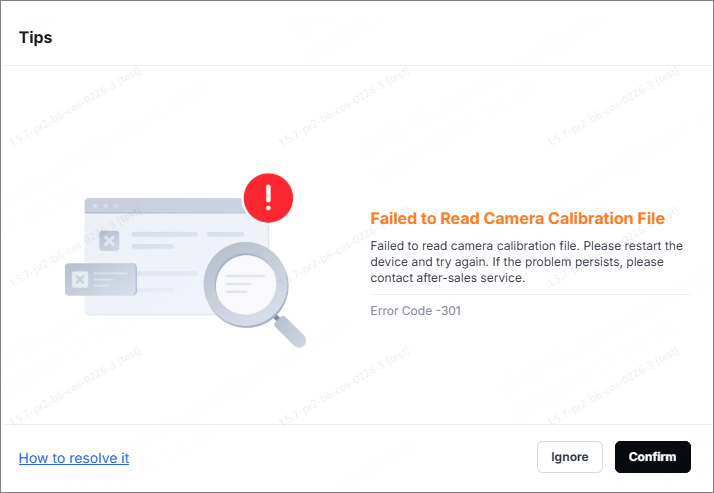
The software displays a pop-up window with the error message "Failed to Read Camera Calibration File" with "Error Code -301". The error code may appear in the scenarios below:
- During device turning on or initialization
- When performing functions that require access to the camera (such as Background Refresh, material recognition, visual positioning, etc.)
- Camera calibration has not been performed before connecting the inkjet module and performing the inkjet module calibration.
Possible causes
- Temporary system communication error
- The software or firmware version is too low
- Distant-view camera firmware error
Troubleshooting procedures
1. Check the inkjet module connection and calibration
Background: The inkjet module calibration relies on the camera calibration file generated by the laser module. Therefore, the laser module camera calibration must be completed before performing the inkjet module calibration.
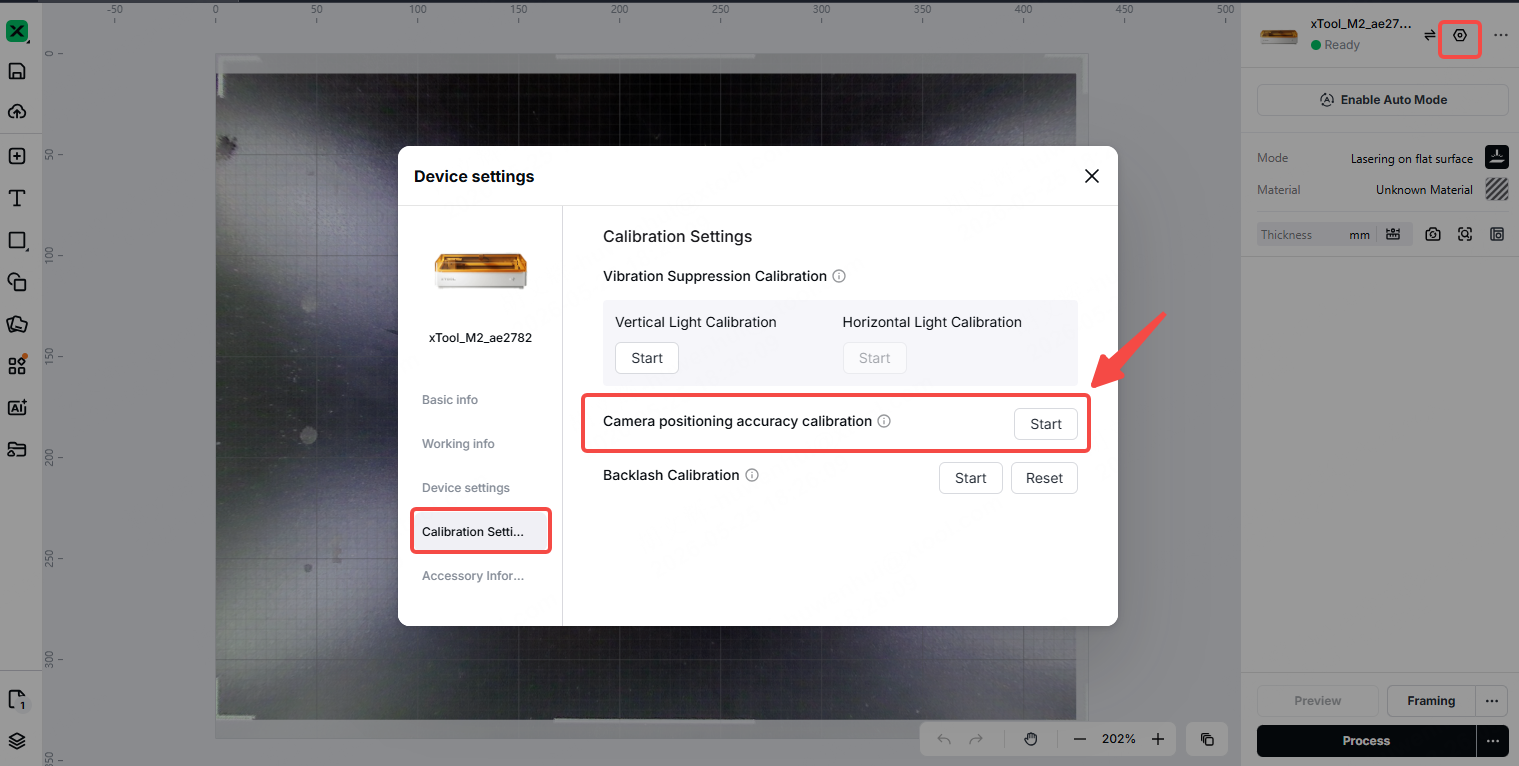
Follow the steps below:
- First, install the laser module on xTool M2.
- Follow the official tutorial to perform the camera calibration. Refer to the video tutorial.
- Once the laser module camera calibration is successful, the software generates a camera calibration file.
- Remove the laser module and install the inkjet module.
- Follow the official tutorial to perform the inkjet module calibration. Refer to the video tutorial.
If you have already connected the inkjet module directly and are ready to calibrate it:
- First, install the laser module and complete the camera calibration in the correct order as described above.
- Once completed, switch to the inkjet module to perform the calibration.
2. Restart the device
(1) Turn off the power supply of the device and wait about 10 seconds.
(2) Turn the device on and wait for it to finish the self-check test and initialization (about 30 seconds).
(3) Restart the xTool Studio software.
(4) Check whether the error code has been resolved after restarting.
- If the issue is resolved, it was a temporary communication error.
- If the issue persists, please proceed to the next steps.
3. Check the software and firmware version
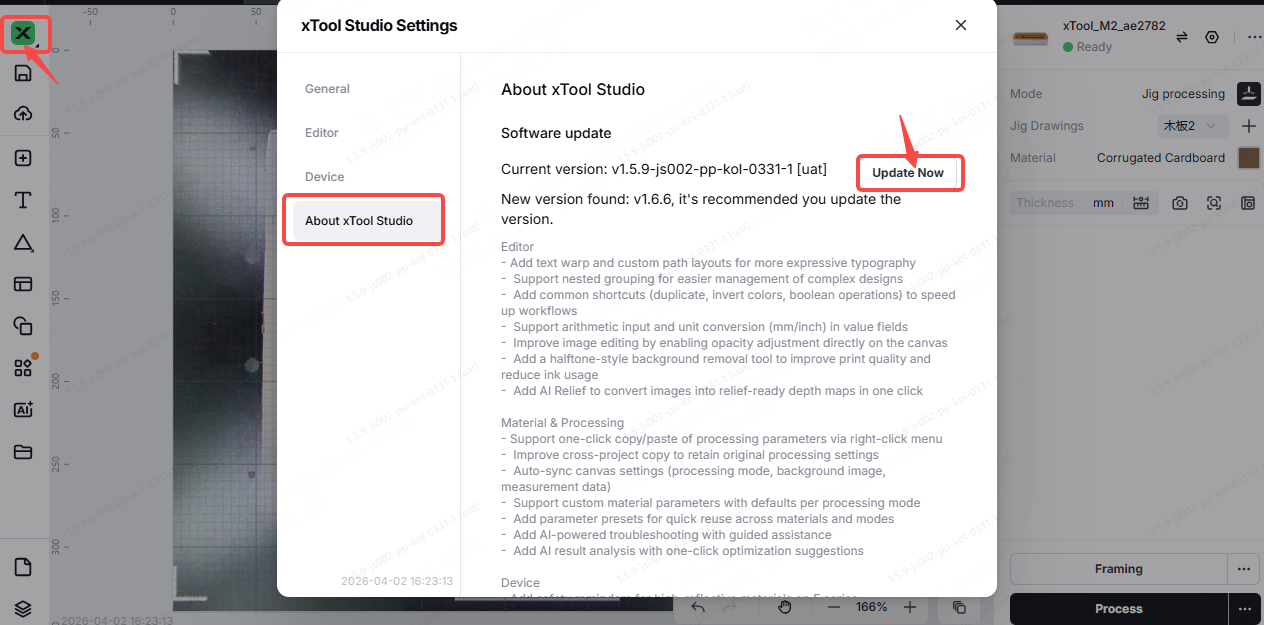
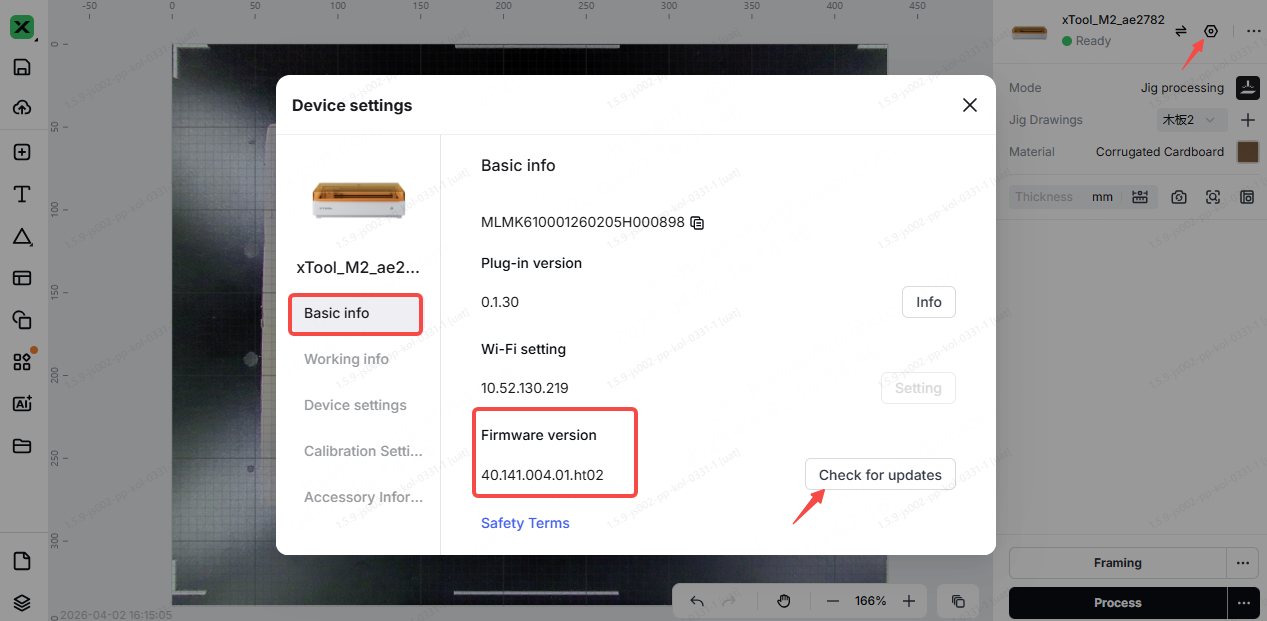
Check that the software and firmware versions are the latest. If not, click Check For Update to update.
Software:
Firmware:
4. Determine the faulty types of the camera
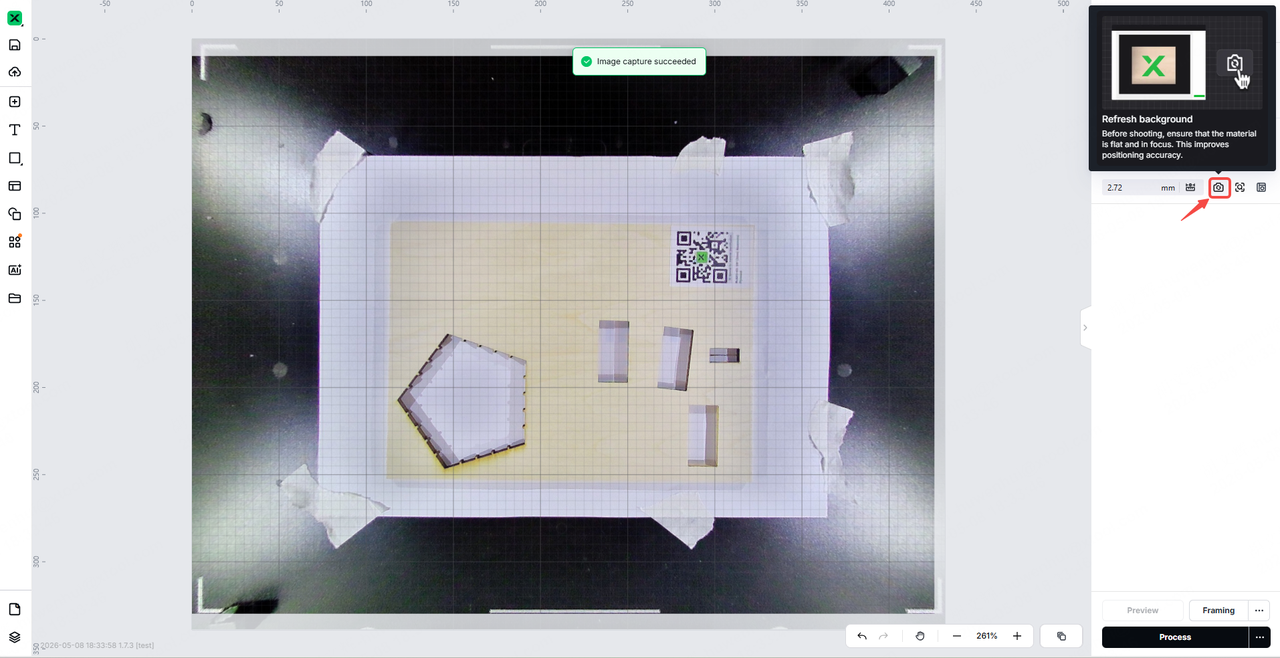
(1) Find the distant-view and close-view cameras in the software.
Distant-view camera:
Close-view camera:
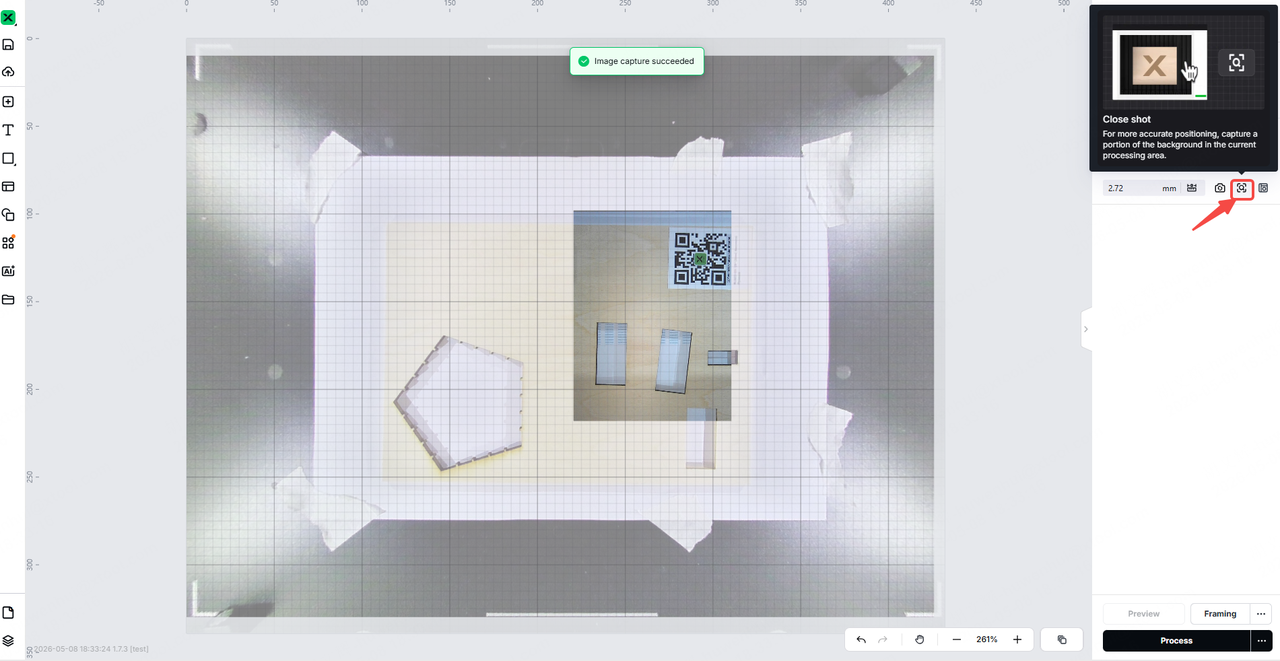
(2) Click the icon to verify whether the image was captured successfully.
(3) How to determine:
- If the camera can capture normally and show the background, it indicates the camera firmware functions well. You may restart the device or update the firmware to solve the issue.
- If the error code persists, it indicates the camera has firmware issues. Please proceed to the next step.
5. Check the connection cables of the camera
(1) Turn off the device and disconnect the power cable.
(2) Inspect the camera connection cables on both the main control board and the camera ends. Ensure that the cable connectors are fully inserted into the ports and are neither misaligned nor loose. If any cables are noticeably loose, reinsert them firmly to ensure a secure connection.
- Camera connection cables on the main control board:
Refer to the video from 0:00 to 0:50 to locate the connection cable on the back of the main control board.
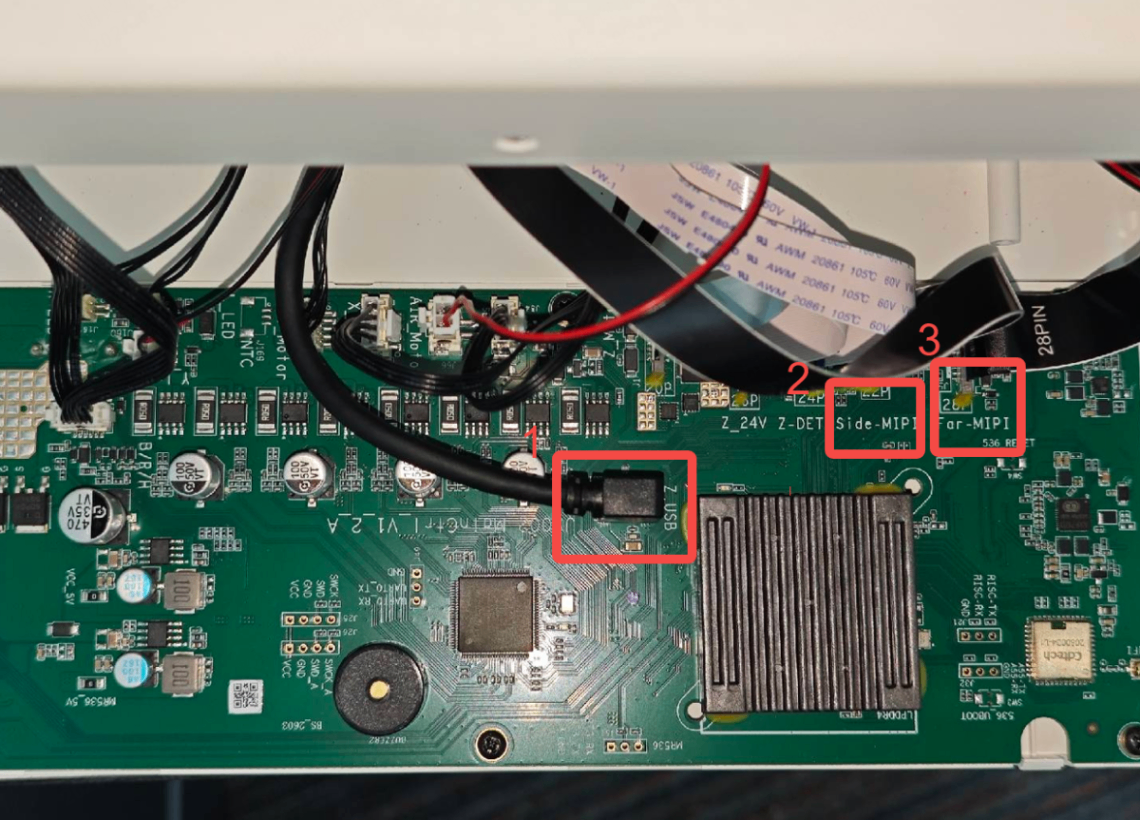
- Close-view camera: Locate position 1 to find the connection cable of the close-view camera. Check whether the cable is loose.
- Distant-view camera: Locate position 3 to find the connection cable of the distant-view camera. Check whether the cable is loose.
- Camera connection cables on the camera:
- Close-view camera: Refer to the video from 0:00 to 0:50 to locate the connector of the close-view camera. Check whether the cable is loose.
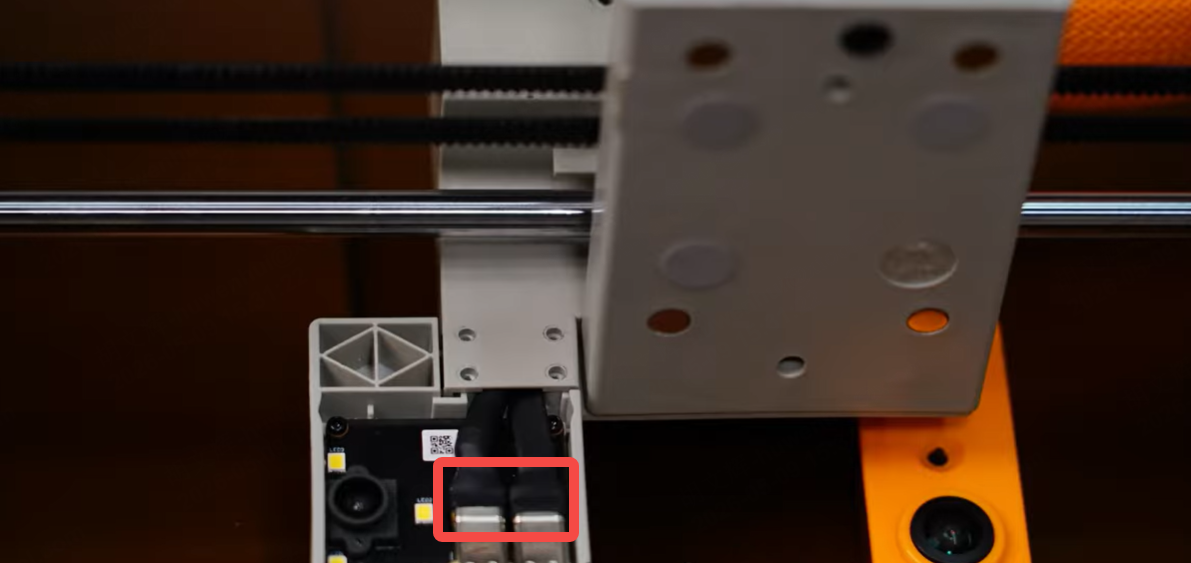
- Distant-view camera: Refer to the video from 0:00 to 0:30 to locate the connection cable of the distant-view camera. Check whether the cable is loose.
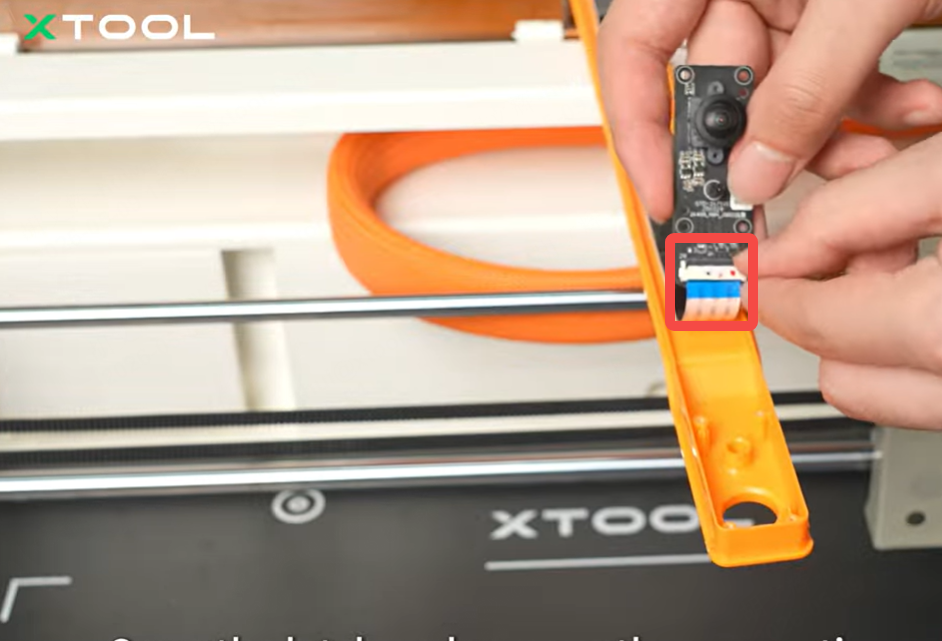
After ensuring that all cables for the faulty camera are securely connected, reconnect the power supply and start the device. Perform Refresh background or start processing again to see whether the error message disappears.