


 ORTUR
ORTUR
 TWOTREES
 Diode Laser Machines
 Laser Modules
 Laser Machine Accessories

 P Series
 S Series
 F Series
 M Series
 Apparel Printer
 MetalFab

 xTool SafetyPro™ AP2 Air Purifier
 Rotary Roller
 Honeycomb
 Extension Kits
 Towers Support Shelf Block


 iCube Series
 SCULPFUN S10
 SCULPFUN S9


 Gantry Carts Kits
 Wheels


Description
The Maker Shield is an all in one GRBL 1.1 solution for CNC control designed for use with the Arduino® Uno and Uno compatible controller boards. This shield features 4 embedded DRV8825 stepper motor drivers making configuring and setting up your system an easy plug and play exercise. Use this shield in your laser engravers, CNC routers, plasma cutters or any robotics project that has stepper motors.
The Maker Shield is superior to the standard CNC shield featuring upgraded tracks for increased current carrying capacity, reverse polarity protection, embedded stepper drivers and much more resulting in superior performance. Only minimal wiring and an addition of an Arduino micro controller is required.
The Maker Shield was designed with ease of use in mind. All the digital I/O pins are clearly labelled for your convenience and as well as easy configuring through micro-step dip switches and current setting potentiometers.

Features:
- Onboard Texas Instruments DRV8825PWPR stepper motor driver IC’s capable of up to 2.4A
- Can control up to 4 stepper motors
- Reverse polarity protection
- Onboard Micro Step up to 1/32 step
- 12-24V power input (24V recommended) (Perfect for adding external fans)
- Onboard auxiliary power output (up to 24V max)
- LED error indicators for each drive channel for easy troubleshooting
- Thicker tracks for higher current carrying capacity and excellent motor performance
- Arduino Uno compatible
https://makerhardware.net/wiki/doku.php?id=electronics:maker_shield_cnc_controller
Credits:
Maker Shield was designed by George of Maker Store and is sold with permission under the Creative Commons License Attribution-NonCommercial-ShareAlike 4.0 International (CC BY-NC-SA 4.0)
Introduction
The Maker Shield is an all in one GRBL 1.1 compatible stepper motor shield designed for the Arduino Uno and Uno compatible microcontroller boards. It has been designed to be easy and intuitive to use with no requirement for additional driver modules.
Key Features
- Reverse polarity protection for the main motor power input (VMOT)
- Onboard Texas Instruments DRV8825PWPR stepper motor driver IC’s
- Dupont motor header pins (A1, A2, B2, B1) for each drive channel
- Onboard Micro Step (up to 1/32) and drive channel enable dip switches
- LED error indicators for each drive channel (including the CLONE channel)
- LED driver Enable indicator
- Voltage Reference pad for easy current adjustment of each drive channel
- Two VMOT header pins (dependant on input voltage used and a Maximum of +24V)
- VMOT Header pins can be used for a cooling fan
- X-Axis, Y-Axis, and Z-Axis header pins for the Clone Axis drive channel
- X, Y and Z channel Limit switch inputs with Loop header pin
- The loop header pins allows for a connection of up to two limit switches per drive channel directly to the board. (when used as a Normally Closed loop)
- Additional GRBL header pins include,
- Probe Pin – Allowing you to set the correct height of your milling tool
- Cool Pin – Coolant control
- Resume – Continue GRBL job after a Hold command or door open (if configured within grbl)
- Hold – Pause the current GRBL job
- Abort – GRBL reset function
- Reset – Full Arduino Uno board reset
- PWM – GRBL PWM output for milling or laser cutters that support variable speed / power
- Spin Dir – GRBL Spindle Enable pin when configured as a milling machine
- Handy micro step table on the back of the Maker Shield
For GRBLv1.1 configuration settings, refer to https://github.com/gnea/grbl/wiki/Grbl-v1.1-Configuration
Application
The Maker Shield CNC Controller is suitable for a variety of small and medium sized automation equipment and instruments including but not limited to: CNC machines, laser engraver / cutter, plotters and drawbots. The integrated drivers are capable of driving standard 4 wire stepper motors with up to 2.5 Amp drive capability per motor coil.
Detailed Pin Descriptions
This section will describe the connection and adjustment settings to get the best out of your Maker Shield. It is recommended to read through this section to become familiar with this board.
Stepper Motor Output Header Pins
The stepper motor header pins are a 4- way Dupont style header pin that describes which drive channel it is used for and the relevant pin assignments. To ensure you get correct motor functionality and rotational direction, refer to your stepper motor wiring guide. Note: The Maker Shield pin assignments are a guide only and while the current assignments are marked as B1 B2 A2 A1 these can also be transcribed as B+ B- A- A+.

Microstep and Enable DIP Switch
Each motor drive channel comes with its own Microstep and channel Enable DIP switch (Z Axis channel shown in picture). To set the required microstep resolution refer to the table below or the table on the back of the Maker Shield. Important NOTE: Ensure you refer to the numbers marked on the board (Circled in RED in the image to the right below) for correct micro step settings and not the numbers marked on the switch itself.

Note : It is important to note that if a drive channel is not being used (not connected to a motor) that the relevant EN switch is in the ‘Off’ position.
Driver Enable Indicator
The Maker Shield incorporates a green GRBL Enable indicator as a visual reminder that the driver IC’s are energised and supplying power to the connected stepper motors.

Drive Channel Error Indicator
Each drive channel incorporates its own error indicator (Y drive channel shown in image) that will illuminate if there is a problem with the driver IC. Some error conditions are overheating or over current detection. If an error condition is detected and is persistent check all wiring is correct and connectors are firmly seated.

Voltage Reference Adjustment
The voltage reference adjustment allows for setting the current output (up to approximately 2.4 Amp) of the driver channel IC. It is important to ensure that the output current matches the motor current rating to ensure smooth and correct operation of your stepper motor. If the values are incorrect, you may end up overheating your motors if the current is set too high or under-powering your motors if the current is set too low. This board also incorporates a handy voltage reference pad for each drive channel.

Limit Switch Connector
The limit switch connector allows up to two limit switches per channel to be directly connected to the Maker Shield. This is achieved by the Loop connector for the respective channel input.

Clone Axis Header Pins
The Clone axis header pins allow you to clone either the X, Y or Z driver channel. When you are cloning an axis, select the step and direction pins for that particular axis that you would like to clone. For more information on how to clone an axis, refer to the Component Assembly section of this manual on how to clone an axis.

Driver IC Cooling
It is highly recommended to provide adequate cooling (heatsinks and fan) for the driver IC’s during normal operation. These drivers can get hot enough to burn before they will shut down due to overheating and will not resume normal operation until the appropriate temperature threshold has been reached. Allowing the motor drivers to overheat may result in missed steps or poor performance. It is recommended to use the provided adhesive heatsinks to aid in heat dissipation.
VMOT Header Pins
The VMOT header pins provide an additional power output that is tied to the VIN voltage used to drive the stepper motors (Max 24V). These pins can be used to run a cooling fan to ensure better cooling and more efficient operation of your Maker Shield.

GRBL Input and Output Header Pins
This board utilises the standard 2.54mm Dupont style header pins (as described in Section 2) for easy and convenient connection of external accessories. Ensure that the polarity of the header pins is correct before connecting peripherals.

Reset Button
The onboard reset button will perform a reset of the Arduino Uno compatible controller. Pressing this button during operation will cause you to lose the current workload that is running on your Arduino Uno compatible controller and halt the current operations. This reset button performs the same function as the Arduino Uno compatible controller’s onboard reset button.

Motor Power Input Connector
The motor power input connector (Blue) is located on the left-hand side of the board. This is where the main power from your power supply is fed into the Maker Shield. Note the polarity marked on the board. Make sure that the maximum input voltage is 24V.

Assembly
Arduino and Maker Shield connection
While taking normal static electricity precautions, insert the Maker Shield onto the Arduino Uno, making sure that the Maker Shield pins are correctly aligned with the Arduino’s pins. Take care not to bend the pins.

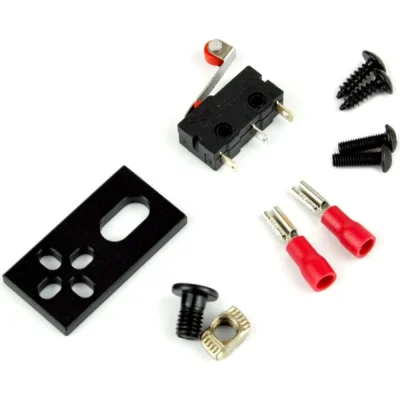
Limit Switch Wiring
Limit switches are necessary if you intend to home your machine and prevent your machine from running into the end of the gantry. We recommend using our 2 Core Shielded Cable to eliminate any potential noise.
There are 2 methods of wiring your limit switches; Normally Closed and Normally Open. The standard configuration in GRBL is the Normally Open configuration. If you wish to use the Normally Closed configuration, you will need to invert the settings in the GRBL settings by changing the $5 setting from 0 to 1.

As shown above our limit switches have 3 pins;
- Pin 1: Common
- Pin 2: Normally Closed
- Pin 3: Normally Open
Normally Open Configuration: If you are using our 2 core shielded cable, connect the blue wire to the “Common” (Pin 1) and the white wire to “Normally Open” (Pin 3).
Normally Closed Configuration: If you wish to use the Normally Closed configuration in your build, connect the blue wire to the “Common” (Pin 1) and the white wire to “Normally Open” (Pin 2).
Method 1: Standard Normally open Limit switch Configuration.
Note that the images below are for illustrative purposes. The signal wire colour in this manual is yellow, use white colour instead as included in your kit.
See the wiring for the Normally Open configuration in the diagram below. This example is for the X axis limit switch. Repeat this step for the Y and Z axis limit switches.

Method 2: Loop configuration with 6 limit switches.
This method shows the connection for wiring two limit switches, this configuration requires the normally closed configuration. Repeat this step for the Y and Z axis limit switches.

Emergency Stop Switch Wiring
Emergency stop switches are recommended for stopping your machine in case of an emergency. When activated, this will cut power to the controller and all work/machine position will be lost.

Cloning the Y-Axis
If your machine has a mirrored axis, also known as a slave axis, the axis will need to be cloned. In most cases the machines have a dual Y-Axis. See below on how to clone the Y-Axis. Insert a shunt in the YD and YS headers as indicated below:

Stepper Motor Wiring
It is important to ensure that your motors are wired correctly. Bipolar stepper motors have 2 coil pairs within them and therefore the wiring has to match these coils The coils typically have a labelling system that labels these coils, A+, A-, B+, B-. A+ and A- correspond to the first coil and B+ and B- correspond to the second coil. In the example shown below for the Nema17 motor; green and black make up coil A and blue and red make up coil B. If these coils are mixed, the motors will vibrate instead of turn or turn in one direction only. For our Nema23 stepper motors, the wiring sequence is Red, Green, Blue , Yellow, for A+, A-, B+ and B- respectively.

Power Supply Wiring
For the best performance, it is recommended to use the MeanWell 350W 24V power supply. Do not exceed the recommended supply voltage of 24V as damage to the components may occur. Ensure that V+ from the Power Supply is connected to V+ on the Maker Shield (red wire) and V- from the power supply to V- of the Maker Shield (Black wire. Our cable has white wire. The Black has been used for illustrative purposes.).

Stepper Motor Driver Settings
To get the best performance from your motor, it is recommended to tune your current and micro-step settings. See below for the settings.
Enabling your motors
As mentioned earlier, the SW1 on your control board corresponds to the enable pin for that particular axis. If you wish to use that axis, enable the axis by moving the dip switch to the UP position. The motor enable interface is shown below:

Current Settings
As stepper motors are current driven devices, you will need to finetune your current settings. Refer to the table below for tuning the current. Refer to the datasheet of your stepper motor to get the correct current rating.
| Reference Voltage (V) | Driver current Output (A) |
| 0.1 | 0.2 |
| 0.2 | 0.4 |
| 0.3 | 0.6 |
| 0.4 | 0.8 |
| 0.5 | 1.0 |
| 0.6 | 1.2 |
| 0.7 | 1.4 |
| 0.8 | 1.6 |
| 0.9 | 1.8 |
| 1.0 | 2.0 |
| 1.1 | 2.2 |
| 1.2 | 2.4 |
To set the current for the driver, you will need the following:
- A multimeter set to measure DC voltage
- A small Phillips head screwdriver
- 2 ended alligator clip.
Procedure:
Refer to the diagram below while you are following the steps.

- Turn on your Maker Shield
- Turn on your multimeter to read DC Voltage
- Attach one end of the alligator clip to the screwdriver and the other end to the positive probe of your multimeter.
- Attach the negative probe to the Voltage reference pad named REF highlighted with the Red square and insert the screwdriver in the adjustment potentiometer. Note that each driver has its own reference pad with the axis label next to it. There is also an adjustment potentiometer specific to the driver. For example, the Y axis Voltage reference pad is named REFY with the potentiometer just below the driver highlighted by the Green square.
- Adjust the Vref to suit your motor. The Vref is 50% the current value. For example, if your motor is 1.0A, adjust the Vref to be 0.5V
- Repeat this for each axis that you intend to use in your build
Micro-Step settings
Apart from current settings, stepper motors can be further fine tuned by means of setting the micro steps. Increasing the micro-steps increases your accuracy. The recommended micro step setting is 1/8th step. The table below will show you how to set the micro-step rate.
IMPORTANT NOTE: Follow the micro step numbering on the silkscreen on the board highlighted in the Green square not the dip switch itself as SW1 corresponds to the Enable pin for the relevant motor.

Micro Stepping Rates
| Micro-Step | SW1 | SW2 | SW3 |
| FULL | OFF | OFF | OFF |
| 1/2 | ON | OFF | OFF |
| 1/4 | ON | ON | OFF |
| 1/8 | ON | ON | OFF |
| 1/16 | OFF | OFF | ON |
| 1/32 | ON | ON | ON |
To set the micro step, peel off the orange protective film on the dip switches and set the dip switch to the desired setting. Flipping the dip switch upwards puts it in the ON position. Note that you may need to adjust the micro-stepping rate in the software as well, depending on the gcode sender that you are using. This guide uses 1/8th step so no further calculations are required as to the steps per revolution settings in GRBL.
53 reviews for Maker Shield – Arduino Uno Compatible Shield GRBL 1.1 CNC Controller
Clear filtersMore Products

Twotrees ER16 Spring Collet Set CNC Chuck – 1.5mm
In stock

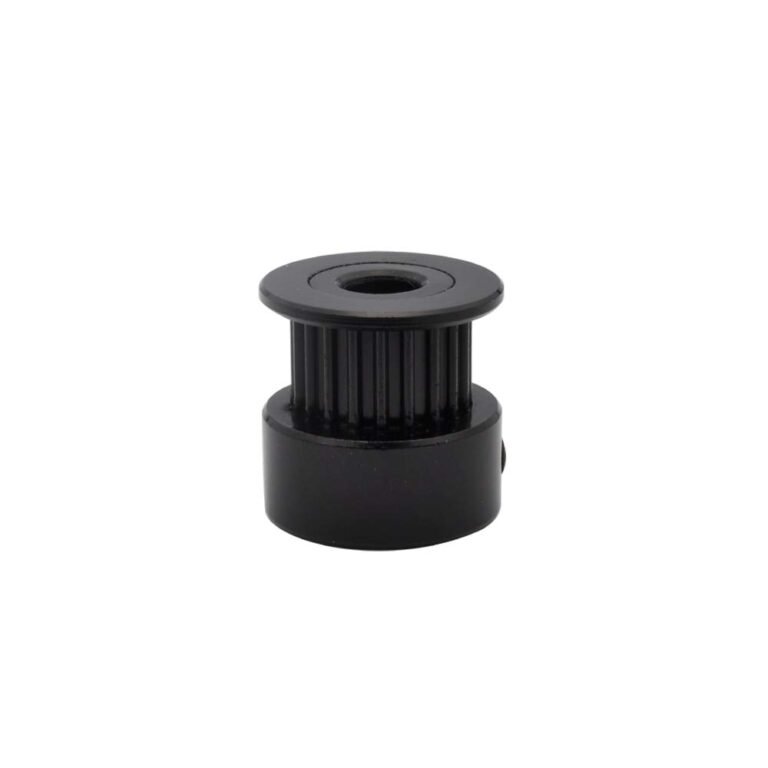
GT2 20 Teeth Timing Belt Pulley-Belt Width 6mm Black
In stock
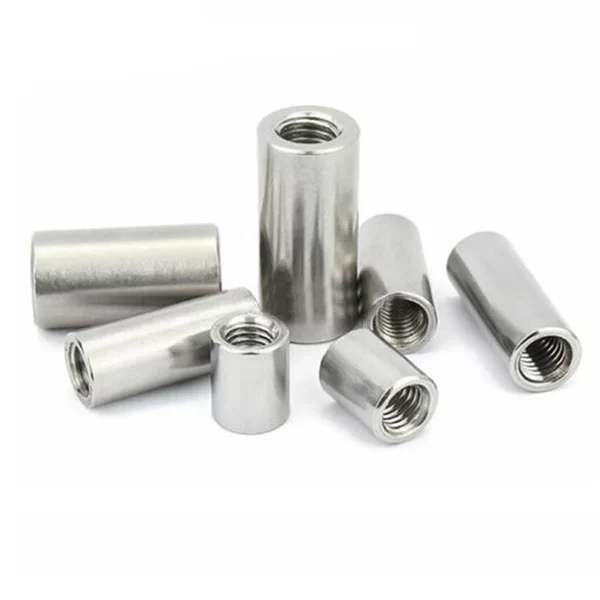
Threaded Round Spacers – M5 x 8, 30mm
In stock
NTC100K Thermistor Temperature Sensor for High Temperature Filament 350 Degree Hotend Kit – 2
In stock


Sumati Sinha (verified owner) –
Been using a lot of items, this one is obviously the best
Doshagya Mishra (verified owner) –
The first time I got the urges to leave a comment, but this is simply a top-notch thing you can find.
Gulshan Chopra (verified owner) –
Great item! It provides too many things compared to its price charged.
Jagannath Kuswaha (verified owner) –
It’s far better than those similar products, while the price is still acceptable.
Store manager mechblock –
Thank you so much for taking the time to leave us a 5-star rating – it’s much appreciated!
Raeja Iyengar (verified owner) –
Think everyone should know about this, it’s just beyond my expectations
Store manager mechblock –
Thank you for your kind recognition, customer’s satisfaction is always our goal.
Maya thakur (verified owner) –
Good response from the support.
Store manager mechblock –
We’re glad you are satisfied with our item! Will do our best to keep improving it in the future.
Kanchan Arora (verified owner) –
I think this is amazing. Lots of features and customizable from every point of view. The few times I asked for help in support they were competent, fast and above all very patient. Really recommend
Joyeeta Gupta (verified owner) –
Been using it for a while, I usually don’t write a review but this time I am truly convinced to write.
Santha Grover (verified owner) –
I got excellent support for this item. They were patient with me, and helped me solve my issue. I recommend this company 100%
Munna Shah (verified owner) –
Think everyone should know about this, it’s just beyond my expectations
Reena Kohli (verified owner) –
Good response from the support.
Rachanna Bansal (verified owner) –
This is the best support for a product I had so far, they reply quickly and solve themselves the problems most of the time. Kudos guyz
Shantay Mishra (verified owner) –
This machine is the best I’ve ever seen, great quality, beautiful packaging, top notch engraving and cutting, thanks MechBlock!
Bhavana ben (verified owner) –
I am a beginner and this laser engraver is equipped with everything I need. I USED GBRL SOFTWARE WITH A MAC SYSTEM AND THE CONNECTION WAS EASY. When cutting wooden blocks, I find it as easy as carving planks. And the effect is not bad, it is a good laser machine.
Lalita Jain (verified owner) –
The machine came a few days earlier than stated. Very well packaged and the installation also went smoothly. After I executed the commands and calibrated the device, everything went as it should and the machine correctly found the position of the laser head. I hope that it will remain stable in the future and that the values will remain as it is calibrated. Everything works correctly I am really impressed with the performance of the machine and the results of the laser work.
Amrita Desmukh (verified owner) –
Equipped with detailed assembly instructions, making assembly very easy to complete in 30 minutes. This laser machine is also suitable for inexperienced users. I am very satisfied!
Ananta Singh (verified owner) –
Fast shipping and perfectly packaged. The laser machine is of high quality, operated according to the instructions, even beginners can master it quickly, everything is as described, it is great.
Gayatri Shastri (verified owner) –
Very nice machine. With Lightburn very easy to work with it.
Pooja Saxena (verified owner) –
I am very satisfied with the engraving machine, I am a beginner and would like to familiarize myself with this equipment. It definitely fits the purpose. Looking forward to the effect!
Bhagyamma Sharma (verified owner) –
I did find that there was some smell while using it and found it would be better to use this engraver in a ventilated area. I think it should be necessary to buy another air assist to direct the airflow to the outside, the effect will be better!
Arni Chaturvedi (verified owner) –
Very fast shipping, arrived quicker than I thought, everything in perfect condition, no damage and complete with accessories. I have tested the machine and everything works fine. This machine is really nice, I love it. I will recommend it to my friends!
Pawan Sinha (verified owner) –
Perfect machine, well packaged, great engraving and cutting, worth buying!
Krsna Sharma (verified owner) –
Easy assembly, directions were very easy to follow. Download light burn and easy to setup. Tested it out and did my Sasquatch for my cutting boards.
Manmohan Karthick (verified owner) –
The machine came a few days earlier than stated. Very well packaged and the installation also went smoothly. After I executed the commands and calibrated the device, everything went as it should and the machine correctly found the position of the laser head. I hope that it will remain stable in the future and that the values will remain as it is calibrated. Everything works correctly I am really impressed with the performance of the machine and the results of the laser work.
Manjula ben (verified owner) –
Equipped with detailed assembly instructions, making assembly very easy to complete in 30 minutes. This laser machine is also suitable for inexperienced users. I am very satisfied!
Saroja Singh (verified owner) –
Akshay Sharma (verified owner) –
ChhoteLal (verified owner) –
I am a beginner and this laser engraver is equipped with everything I need. I USED GBRL SOFTWARE WITH A MAC SYSTEM AND THE CONNECTION WAS EASY. When cutting wooden blocks, I find it as easy as carving planks. And the effect is not bad, it is a good laser machine.
Lalit Mehta (verified owner) –
Very nice machine. With Lightburn very easy to work with it.
Baburam Sharma (verified owner) –
Fast shipping and perfectly packaged. The laser machine is of high quality, operated according to the instructions, even beginners can master it quickly, everything is as described, it is great.
Sudama Gupta (verified owner) –
This machine is the best I’ve ever seen, great quality, beautiful packaging, top notch engraving and cutting, thanks MechBlock!
Nandu Sharma (verified owner) –
I am very satisfied with the engraving machine, I am a beginner and would like to familiarize myself with this equipment. It definitely fits the purpose. Looking forward to the effect!
Shantai Banerjee (verified owner) –
I did find that there was some smell while using it and found it would be better to use this engraver in a ventilated area. I think it should be necessary to buy another air assist to direct the airflow to the outside, the effect will be better!
Rakhi Garg (verified owner) –
Very fast shipping, arrived quicker than I thought, everything in perfect condition, no damage and complete with accessories. I have tested the machine and everything works fine. This machine is really nice, I love it. I will recommend it to my friends!
Dhavala Shinde (verified owner) –
I am very satisfied with the engraving machine, I am a beginner and would like to familiarize myself with this equipment. It definitely fits the purpose. Looking forward to the effect!
Ekanjeet Mishra (verified owner) –
Perfect machine, well packaged, great engraving and cutting, worth buying!
Tipu Patel (verified owner) –
Easy assembly, directions were very easy to follow. Download light burn and easy to setup. Tested it out and did my Sasquatch for my cutting boards.
Rishab Mallhotra (verified owner) –
Very fast shipping, arrived quicker than I thought, everything in perfect condition, no damage and complete with accessories. I have tested the machine and everything works fine. This machine is really nice, I love it. I will recommend it to my friends!
Bakul Chauhan (verified owner) –
Ratan Lal (verified owner) –
The machine came a few days earlier than stated. Very well packaged and the installation also went smoothly. After I executed the commands and calibrated the device, everything went as it should and the machine correctly found the position of the laser head. I hope that it will remain stable in the future and that the values will remain as it is calibrated. Everything works correctly I am really impressed with the performance of the machine and the results of the laser work.
Arasu Verma (verified owner) –
I did find that there was some smell while using it and found it would be better to use this engraver in a ventilated area. I think it should be necessary to buy another air assist to direct the airflow to the outside, the effect will be better!
Mallikarjuna Anand (verified owner) –
Equipped with detailed assembly instructions, making assembly very easy to complete in 30 minutes. This laser machine is also suitable for inexperienced users. I am very satisfied!
Barir Mehta (verified owner) –
Fast shipping and perfectly packaged. The laser machine is of high quality, operated according to the instructions, even beginners can master it quickly, everything is as described, it is great.
Chandra Thakur (verified owner) –
This machine is the best I’ve ever seen, great quality, beautiful packaging, top notch engraving and cutting, thanks MechBlock!
Abheek. Garg (verified owner) –
I am a beginner and this laser engraver is equipped with everything I need. I USED GBRL SOFTWARE WITH A MAC SYSTEM AND THE CONNECTION WAS EASY. When cutting wooden blocks, I find it as easy as carving planks. And the effect is not bad, it is a good laser machine.
Subodh Kant (verified owner) –
Very nice machine. With Lightburn very easy to work with it.
Gangabai Joshi (verified owner) –
Very nice machine. With Lightburn very easy to work with it.
Chiranjiv Tayal (verified owner) –
Basavaraja (verified owner) –
Ankush Garg (verified owner) –