

Refer to the first part of the Unboxing xTool F1 Slide Extension Accessory video.
Process multiple materials in batches
1. Place the material and perform laser focusing
(1) Place a material in the processing area, allowing the blue light spot to fall on the surface of the material.
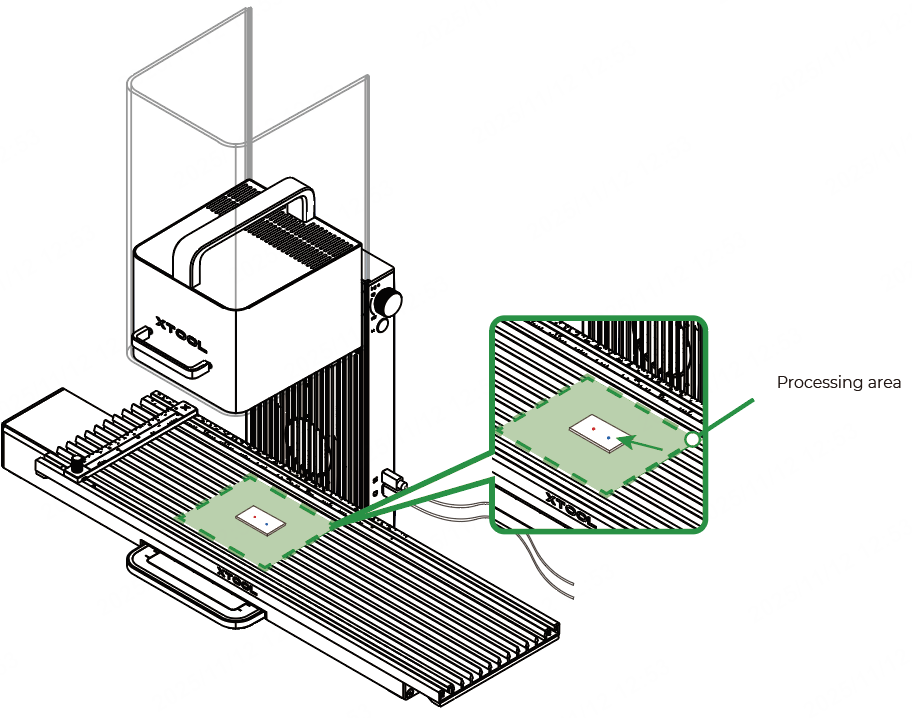
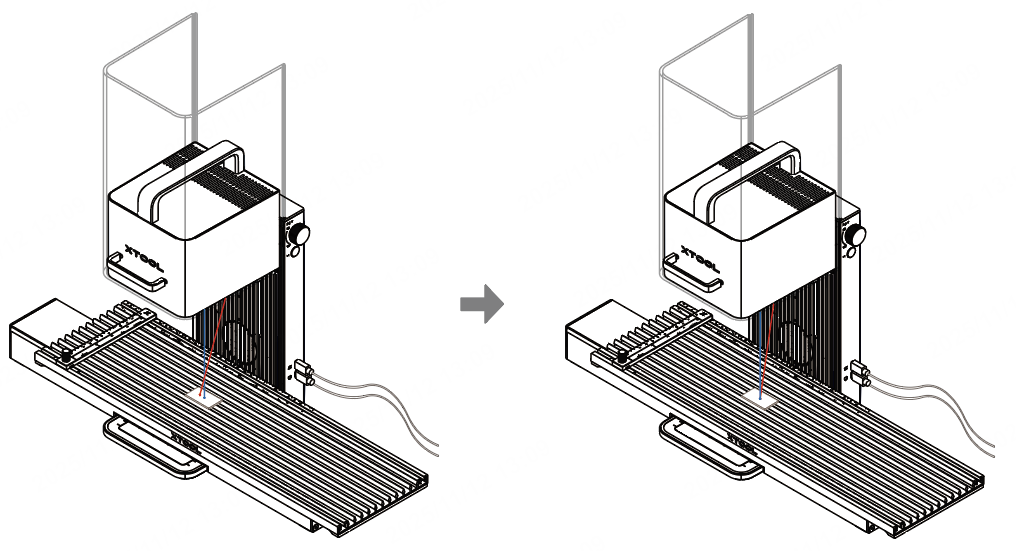
(2) Hold down on the Up/Down button for laser module to lift or lower the laser module. When the red and blue light spots overlap, the focus is successfully set.
(3) Place more materials to the right of the processing area on the slide extension.
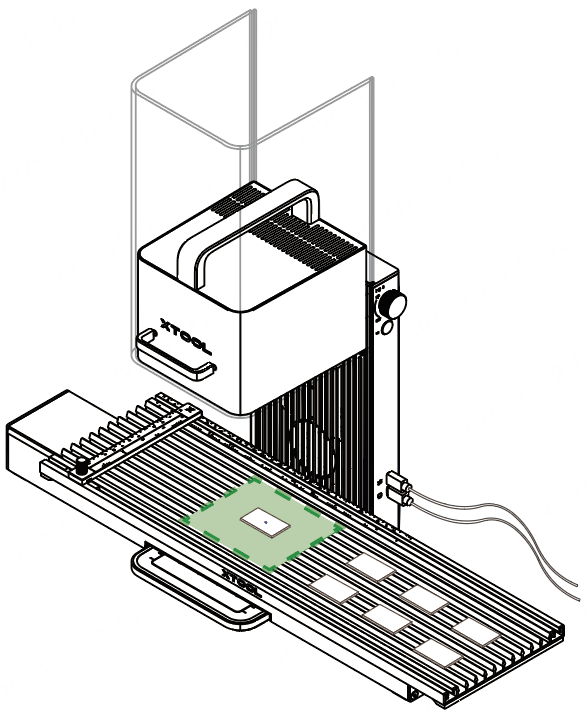
- When placing materials, keep your hand away from the processing area to avoid injuries.
- Do not place a material close to the edges. Otherwise, the material may fail to be processed.
- Ensure that the materials do not touch or overlap with each other.
2. Select the material and processing mode
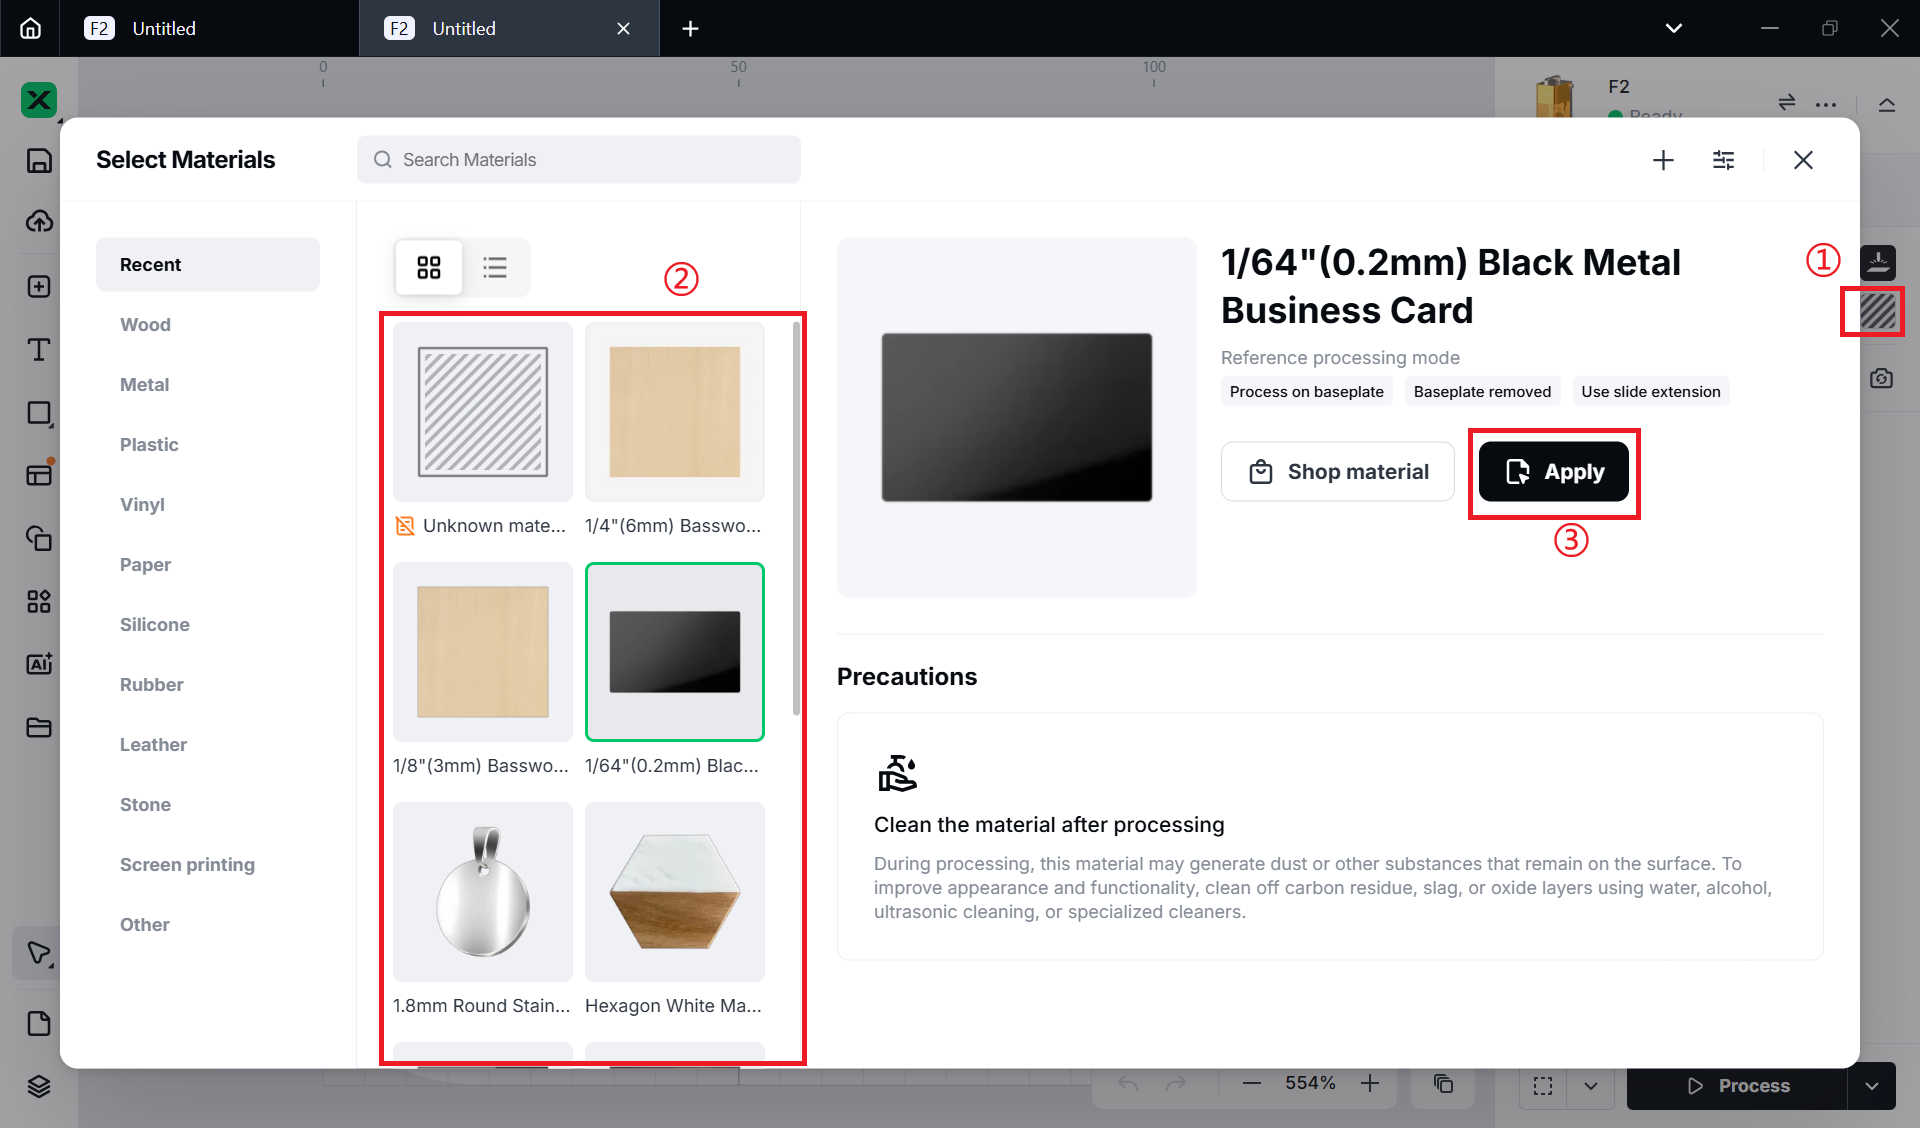
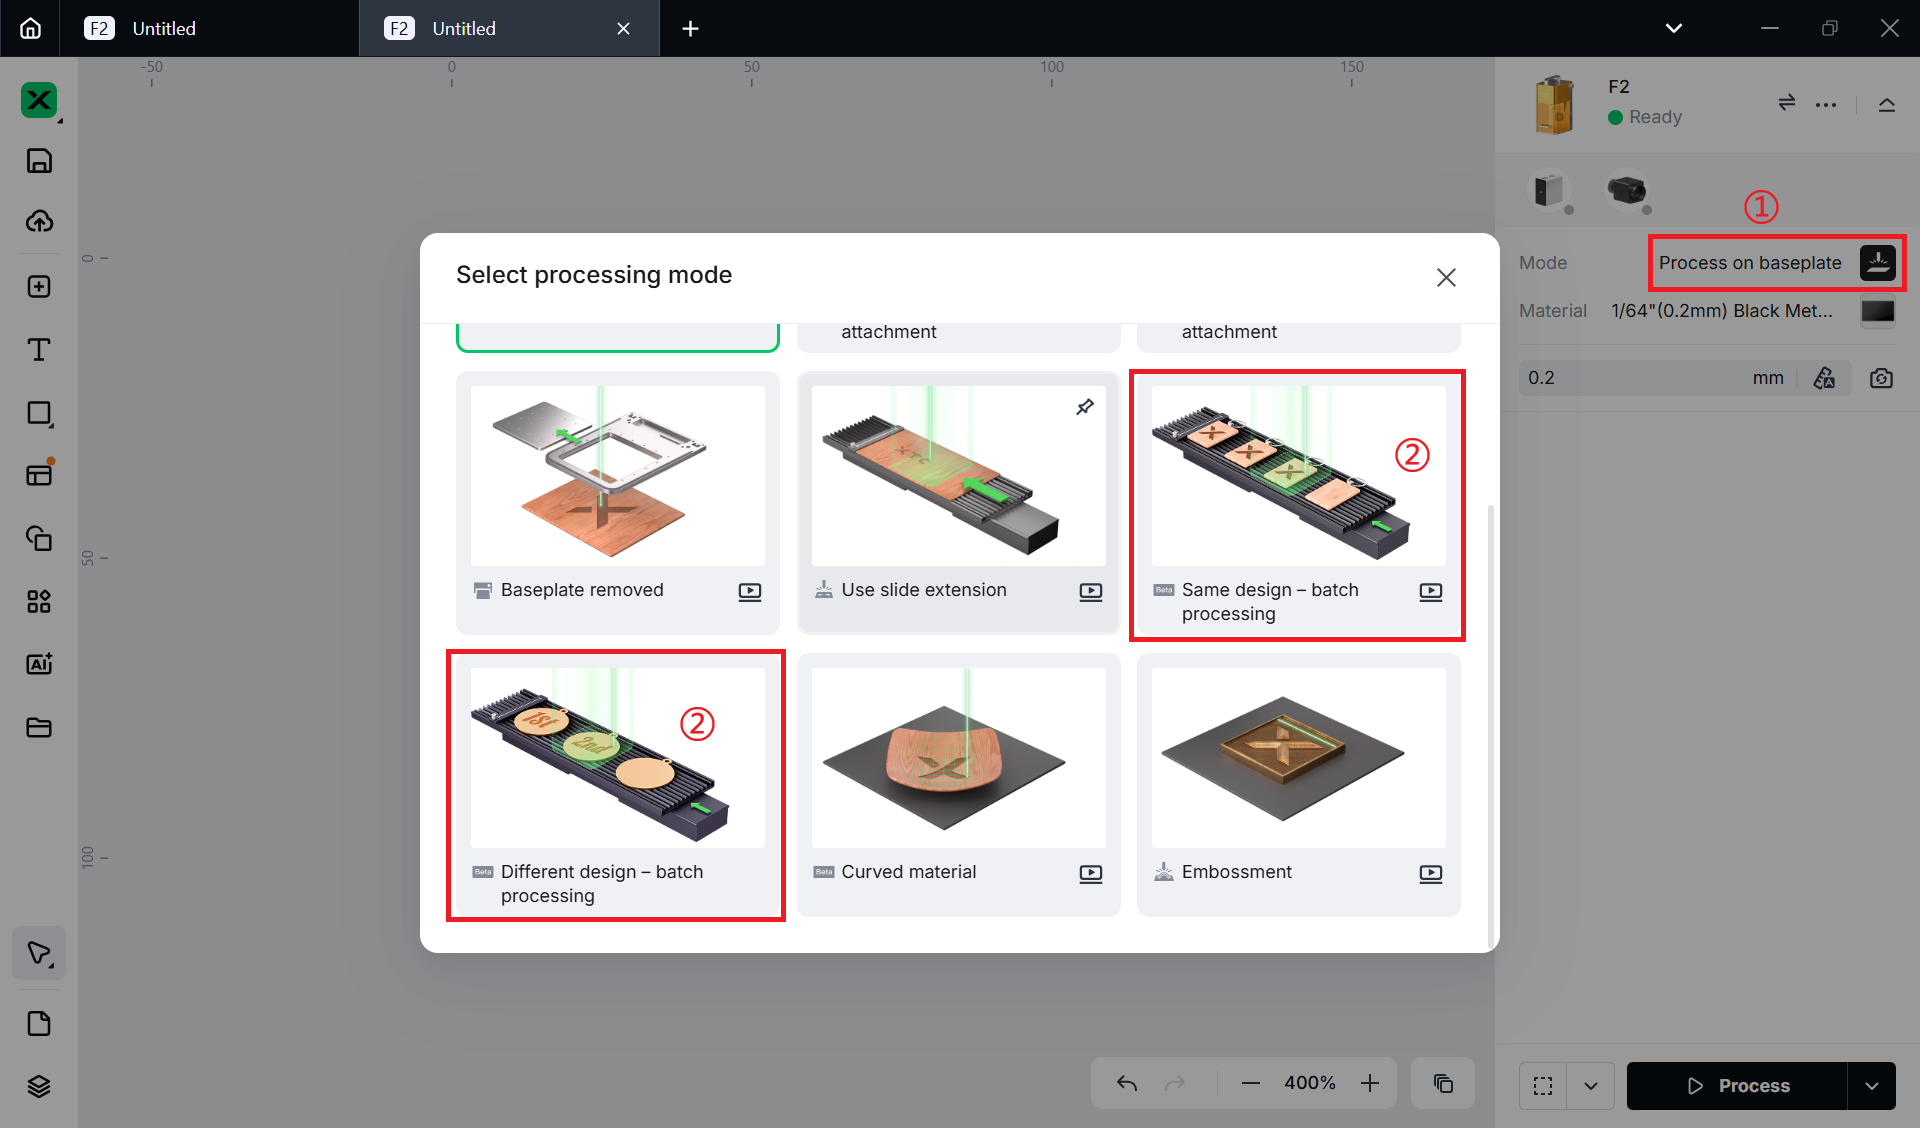
(1) On the top-right corner, click Unknown material, select the name of your material, and click Apply.
(2) Select Same design - batch processing or Different design - batch processing mode.
3. Shoot background and design a processing object
(1) Click the Refresh background button. xTool Studio takes a photo of xTool F2’s processing area and inserts the photo as the canvas background.
- To ensure positioning accuracy, set the laser focus before shooting background.
- Ensure that the background photo can fully and clearly display the material. You can adjust the shooting environment by adjusting the device's fill light or pulling down the protective enclosure.
- If the materials in the photo have obvious shadows or are not clear, adjust the material position and click Refresh again to take a new photo.
(2) Using the tools on the left of the canvas, create an object inside the material.
(3) Select the object for further edit using the tools on the top of the canvas.
Tips: For more information on how to use xTool Studio to design objects, see Software Learning Center.
4. Set the processing parameters and processing path
(1) Select objects on the canvas. On the right side of xTool Studio, set parameters for the selected objects.
Note: For more information about the processing parameters, see The Processing Parameters for xTool F2.
(2) In the bottom-right corner of xTool Studio, click the  icon to set the processing path.
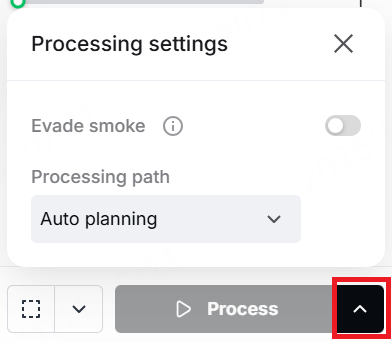
Evade smoke: When this feature is enabled, the device follows a path less affected by the smoke to process the material.
Processing path:
- Auto planning: xTool Studio automatically plans the processing path based on intelligent algorithms.
- User defining: Manually set the processing paths for some objects.
5. Preview the processing area
Framing means laser dots walk along the border of the processing objects on the material. You can preview the processing area on the material by framing. Take the following steps to start framing:
(1) At the bottom right corner of the software, click the icon next to
to set the parameters for framing.
- Light power: Sets the laser power for framing.
- Mode: In the Rect mode, laser dots walk along the rectangle border of the processing objects. In the Outline mode, laser dots walk along the outline of the processing objects. In the Polygon mode, laser dots walk along the polygonal border of the processing objects.
(2) Click in the software or press the framing button on xTool F2 to start framing. The laser spot will move along the boundary of the processing pattern on the material so that you can preview the processing area.
or
To stop framing, click the icon again.
Note: If the processing area is not ideal, adjust the object positions in the software, and the boundary shown on the material changes accordingly in real time.
6. Frame out the sample material
The first material placed in the processing area is used as the sample material. During batch processing, xTool Studio will fill the other materials based on the sample design. Framing out the sample material helps improve the accuracy of batch filling.
(1) Click Next.
(2) In the pop-up window, move or resize the bounding box to include the sample material inside it. Then, click Process.
7. Start processing
Note:
- When xTool F2 is used with a slide extension, its protective enclosure cannot be fully closed. For your safety, it is recommended that you wear goggles during processing.
- Safety goggles are not included with xTool F2 or the slide extension. Please purchase them separately.
(1) Wait until the Check before processing is finished.
(2) Click Start button.
(3) When the software shows “Ready”, pull down the protective enclosure and press the Start/Stop button on the xTool F2 to start processing.
8. Stop processing
Auto-stop: If no material is detected for 5 consecutive times, the batch processing will be automatically ended.
Manual-stop: Click Cancel in xTool Studio or double press the Start/Stop button on xTool F2.