If you are stepping into the world of xTool UV vs. CO2 vs. Diode Lasers, you’ve likely hit the ultimate roadblock: Which laser module should I choose? With so many options on the market, understanding the real-world differences between these technologies is crucial for achieving professional results.
Because Mechblock.in specializes in high-performance laser systems, we want to provide an unbiased, side-by-side comparison. While technical specs matter, what you really care about is how your final product looks and the steps it takes to get there. To showcase these differences, we put the xTool UV, CO2, and Diode technologies to the test on three popular materials: Glass, Wood, and Leather.
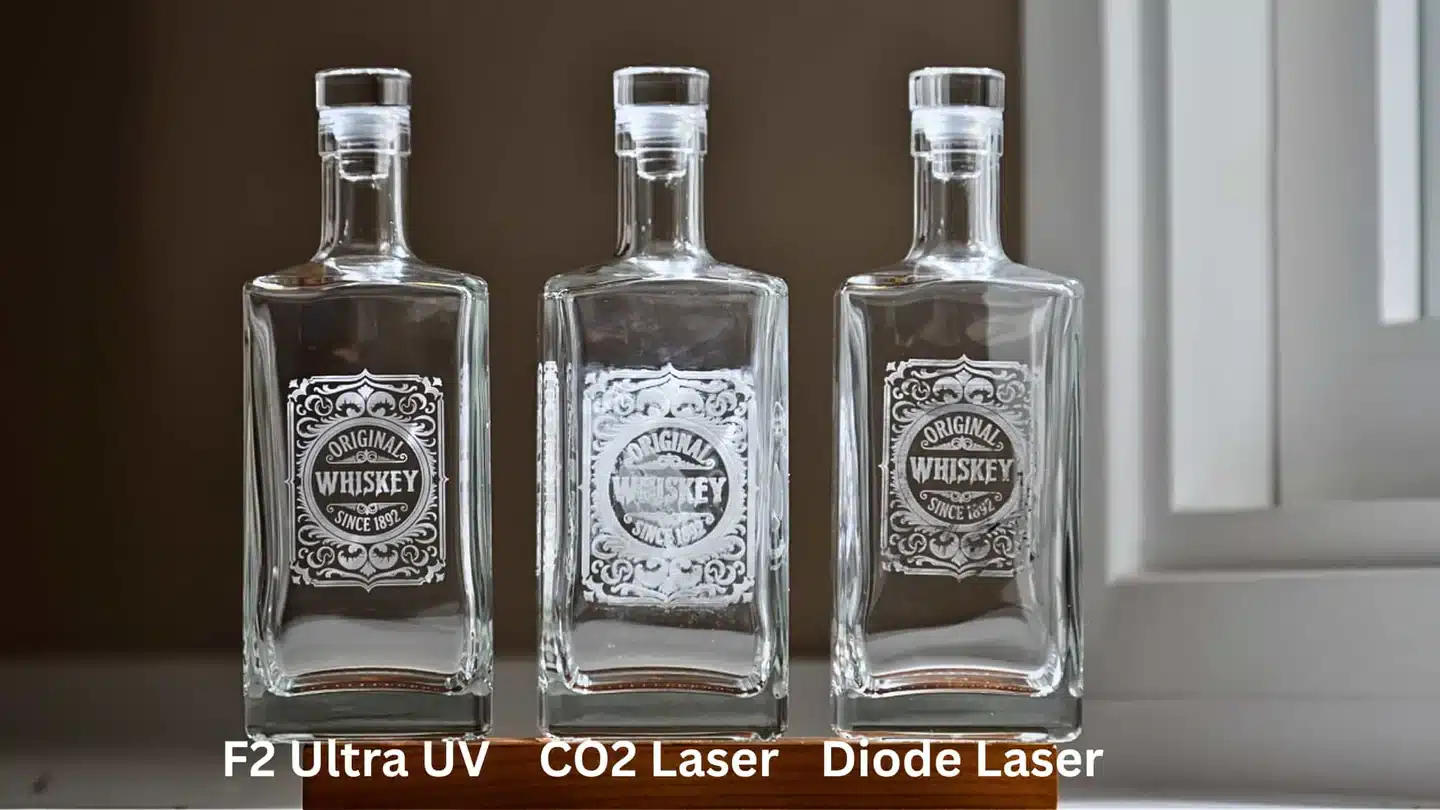
Engraving glass is the best way to see how different laser wavelengths interact with transparent, fragile surfaces.
UV Laser: Known as "cold lasers," UV modules break molecular bonds with minimal thermal impact. This results in a highly detailed, elegantly frosted surface. Because there is little heat, it is exceptionally safe for ultra-thin or delicate glassware.
CO2 Laser: These use intense infrared heat to create micro-fractures in the glass. This produces a bright, highly visible, textured mark. It is perfect for thick bottles, though you must be careful with fragile items to avoid cracking.
Diode Laser: A standard blue Diode laser passes right through clear glass. To get a mark, you must apply a secondary coating (like tempera paint or marking spray) to absorb the energy.
UV & CO2: Direct engraving. Simply place your clean glass under the laser and start.
Diode: Indirect engraving. Apply coating $\rightarrow$ wait to dry $\rightarrow$ engrave $\rightarrow$ wash glass thoroughly afterward.
Pro Tip: If your business focuses on high-end personalized glassware, check out the latest laser collections at Mechblock.in to find a machine that eliminates messy coatings.

Leather is a staple for patches, wallets, and keychains. As an organic material, it reacts strongly to heat, making your laser choice vital for the final aesthetic.
UV Laser: Provides high-contrast, ultra-fine surface engraving. It captures photographic details (like animal fur) perfectly with zero burn marks or yellowing.
CO2 Laser: Acts like a traditional branding iron. It burns deeper for a rugged, embossed, tactile look. It leaves a natural soot "halo" and charred edges.
Diode Laser: Offers a solid, natural brownish burn. It balances detail and depth well, making it the go-to for standard logos and everyday crafting.
UV: Place --> Engrave --> Done. The leather is clean and ready immediately.
CO2 & Diode: Place - Engrave --> Post-processing. You typically need to wipe the area with alcohol or leather cleaner to remove residual soot and the burnt smell.

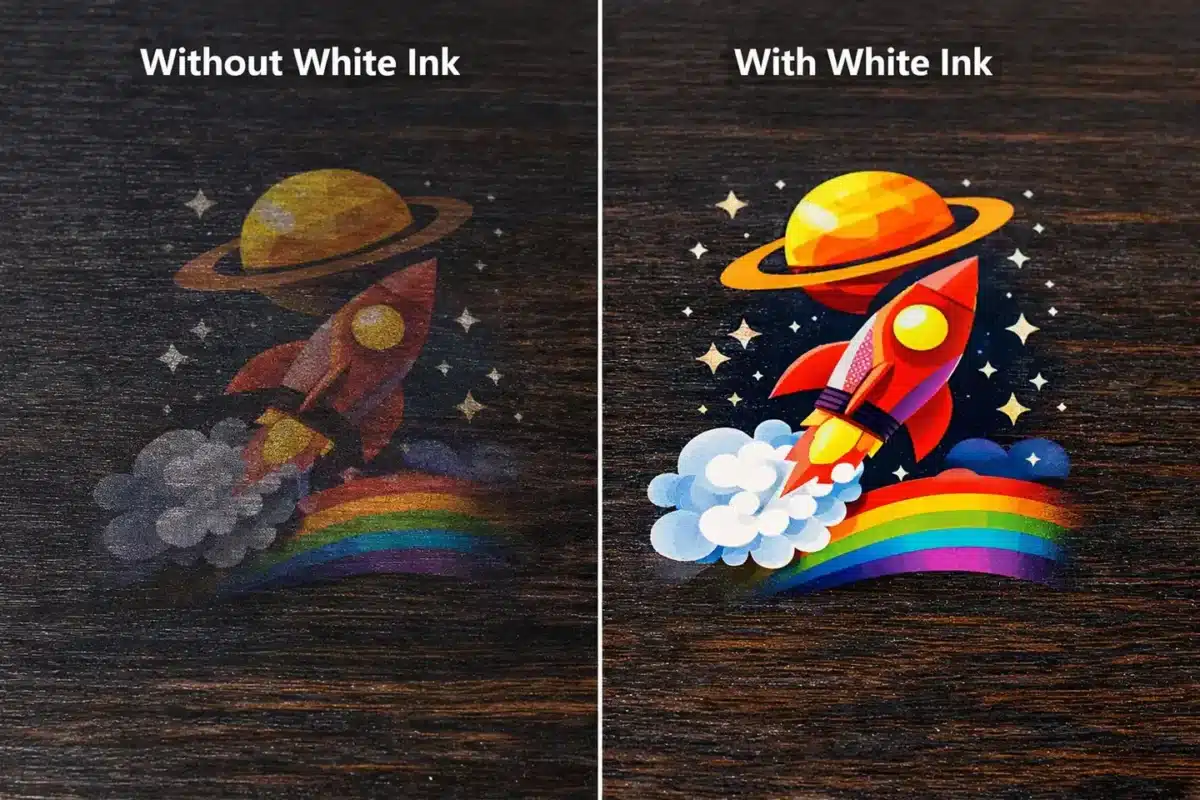
Wood is the most common laser material. Here, the comparison highlights the trade-off between raw cutting power and edge cleanliness.
UV Laser: Exceptional cleanliness. You get virtually zero smoke staining or black charring. However, UV lasers are better suited for surface engraving rather than cutting thick boards.
CO2 Laser: The undisputed powerhouse. It blasts through thick timber quickly. The trade-off is heavy dark charring on the edges and smoke residue on the surface.
Diode Laser: The perfect middle ground. Diodes cut and engrave wood efficiently with a "toasted" brown edge. Smoke residue is present but less intense than CO2.
UV: Direct processing. No surface prep needed.
CO2 & Diode: To achieve a pristine surface, it is highly recommended to apply masking tape $\rightarrow$ Engrave/Cut $\rightarrow$ Peel off tape $\rightarrow$ Lightly sand edges.
For those looking to scale their wood-crafting business, you can browse industrial-grade CO2 and Diode options here.

There is no single "best" laser—only the best tool for your specific workflow:
| Laser Type | Best For... | Key Benefit |
| Diode | Hobbyists & General Crafting | Budget-friendly all-rounder for wood and leather. |
| CO2 | High-Speed Production | Powerhouse for cutting thick wood and acrylics. |
| UV | Ultra-Fine Precision | Best for delicate glass, jewelry, and zero cleanup. |
Ready to upgrade your workshop? Whether you need the raw power of CO2 or the surgical precision of UV, explore the full range of professional equipment at Mechblock.in to find your perfect match!